Tuesday 27 December 2011

Taste Odyssey Tidbits - #'s 10 to 13

My blog hasn't been fallow due to lack of interest, more that I have been involved in a spate of cookbook-related experiments and I'm not fond of posting up whole recipes from somebody else's work.  If I get it from a website, sure, I can just link it, otherwise I feel happier recommending the work of others.

At any rate, I've been busy and managed to learn some lessons which I think are worth imparting even if I don't have too much description to combine with them.

Odyssey #10 - Cookies 'n Cream Cake

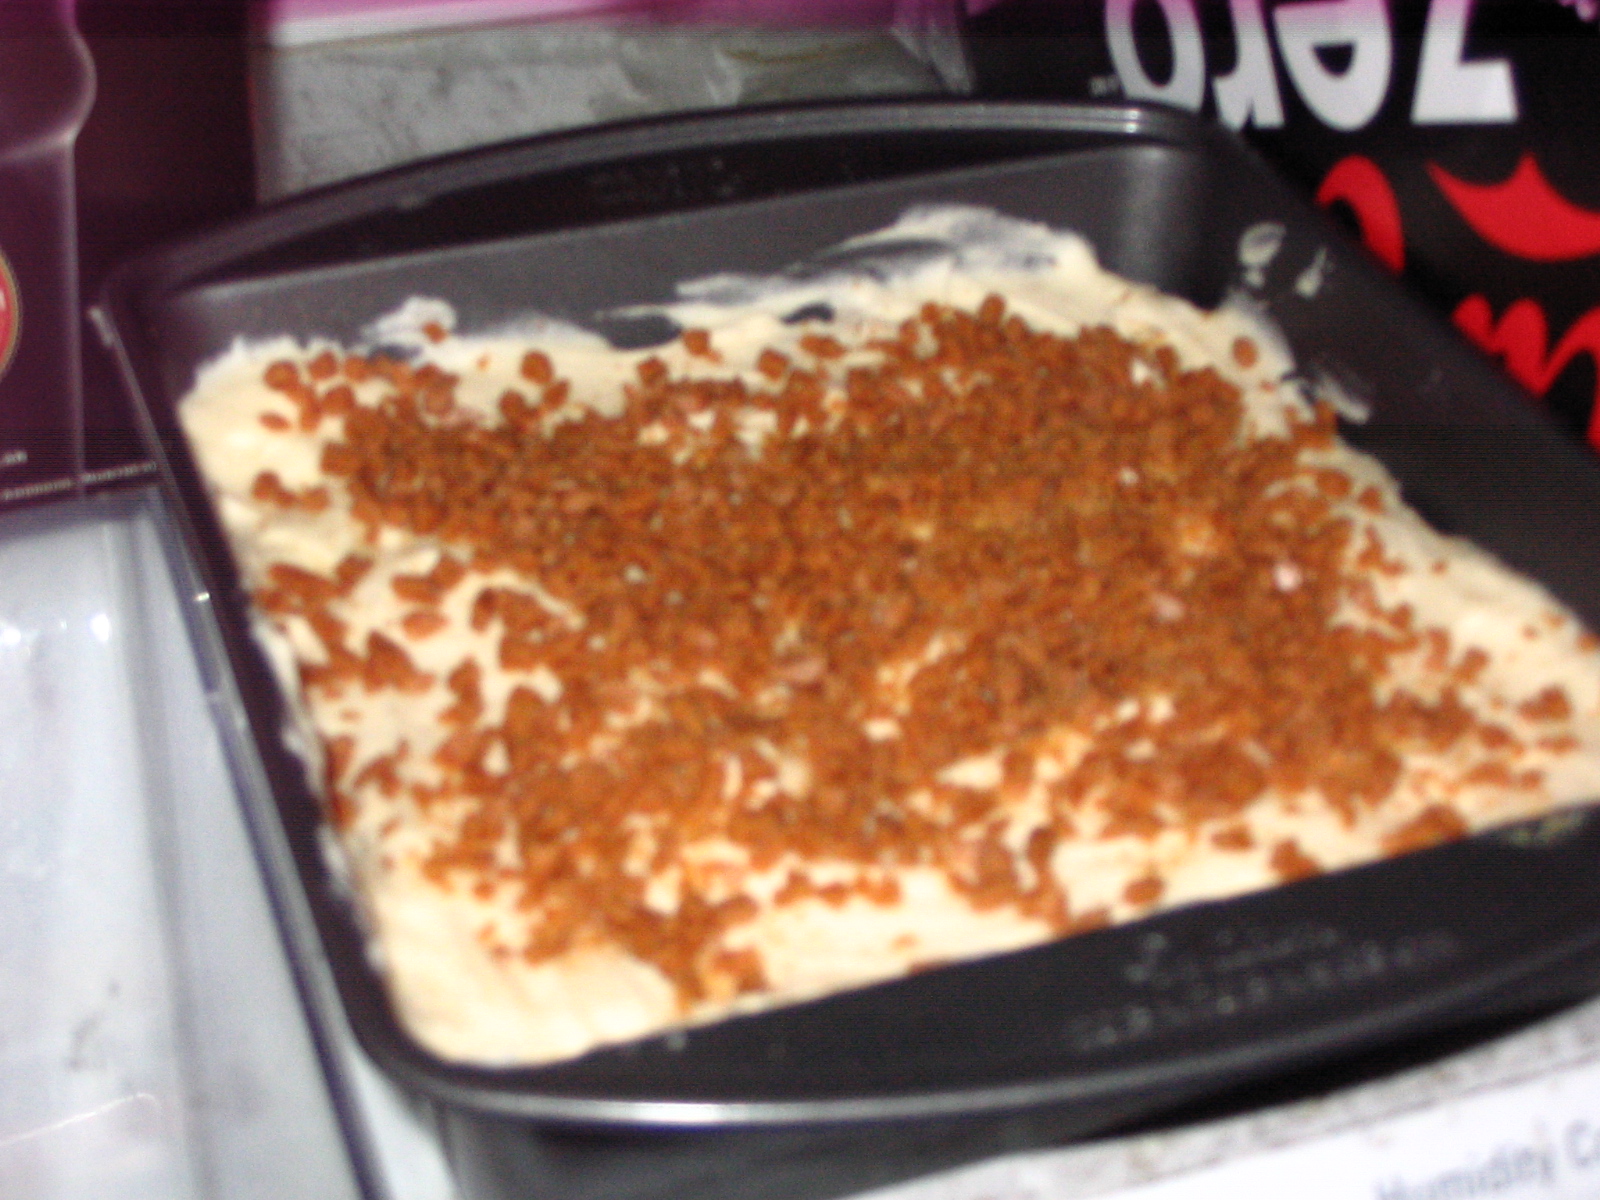
From the ever-dependable 'Piece of Cake'.  This is probably my favorite cookbook; the recipes are all amazing and very simple in a good way.  The big lesson I learned from this particular cake was that you shouldn't judge a baking project until it's completely assembled.  I sampled a little of the cream cheese icing while this was under production and was dismayed that it did not seem anywhere near sweet enough.  When I put the entire cake together, however, the sweetness of the crushed Oreo cookies on top of the cake itself more than made up for the relatively mild icing.  In fact, as wiser minds than mine obviously figured out, having sweet icing with crushed Oreo and Oreo filling on top would have been overkill.


Odyssey #11 and 12 - Chocolate Chip Cookie Squares and Chip Crumbles

I lumped these two together because they are essentially the same recipe, both from the "squares" book of the Company's Coming line (good books, but not great; the baker who writes them relies way too much on fruit for my own tastes).  They are the complete opposite of fancy and by far the easiest recipes I have on hand.  But, for simply jazzing up your basic chocolate chip cookie you can't go wrong with making them into a pan square.  Nice and delicious, especially fresh from the oven.  The only major difference between the two recipes is that the crumbles have a bit more flour and a bit less overall moisture.  For that reason, I prefer them.  Out of the oven they win, hands down.

Odyssey #13 - Cinnamon Roll Bundt Cake with Caramel Icing

Was time to break out the Bundt pan again for this one.  Definite crowd pleaser.  I was trying to find a good cinnamon roll cake recipe and this one fit the bill, but I learned a very, very important lesson from this one.  The reason there are no pictures, in fact, is because I had to make this cake twice to get it right.  The first time, I did not do my usual greasing with butter and then flour the pan, instead going with the spray method the book (Piece of Cake, again) suggested.  Wrong.  Do not fix what isn't broken, which I learned to my dismay as the fresh cake completely split in two as I tried to get it out of the cake pan.

On the second try, I floured the pan as I usually do it and the whole thing was a success.  The caramel icing was trickier - it was done on the stove and I am not used to the whole melting process yet.   In the end it came out as more of a burnt butter icing, but no less delicious for it, let me assure you.  It had an amazing flavor.  I'll try this again to get the icing right, and the cake was fantastic, even with pecans, and I got some valuable baking knowledge from it.

Ghosts of Baking Past

Finally, a quick update on some older posts.  Chocolate cavity-maker cake continues to be my most well received dessert, especially with my homemade vanilla frosting on it.  I'm going to try a variation on it at some point, but that's when I'm feeling experimental, I have tons more regular recipes left to check out.  I did win an award for best dish at a pot luck with it, so clearly it reaches out to many people in some chocolate-y way.

I have also revisited the hated Oreo truffles twice since my first encounter with them.  They are now easy as pie to make, I am pleased to say, and they taste fantastic.  After I learned the secret of melting chocolate in our microwave for the peanut butter bars, it cut down on a lot of the frustration I had earlier.  I have no trouble getting half a batch rolled in half the chocolate and then sprinkled with crushed Oreo before the chocolate either begins to run out or stiffen.

That's it for this year, I suspect, and what a year it's been.  Thanks to everybody who has read any of my adventures in baking.  I'm looking forward to getting more adventurous next year.  Stay tuned for the next update, which is a fresh new website recipe that I made for Christmas dinner.  It was fantastic!

Tuesday 25 October 2011

Taste Odyssey #9 - Thanksgiving Edition

This entry is woefully late if you're in Canada and woefully early if you're in America, so frankly I feel it is timed as perfectly as is possible.  The two events don't have a great deal of similarity beyond the name; we have far less smallpox involved in ours and only during Yanksgiving do you run the risk of being trampled to death the day afterward.

However, both revolve around turkeys and pumpkins, and while I'm not sure what I'd do with the former, the latter certainly presents us with some unique ideas...

Recipe #1 - http://allrecipes.com/Recipe/grandmas-gingersnaps/detail.aspx

But first some ginger snaps!  This is going somewhere, don't worry.  Ginger snaps are a breeze to make, taste delicious, and are always handy to have to snack on.  My only suggestion with this particular recipe is to make sure you mix the ginger well.  I didn't do as good a job as I'd hoped and some cookies ended up way more ginger-y than others.  This is where the hand mixer would have been a huge help.


No, the  dough picture doesn't sell the cookies at all, but once they're cooked?  Oh yes.


I wouldn't eat too many though, as I nearly learned to my great dismay after I switched over to the second recipe...

Recipe #2 - http://allrecipes.com/recipe/marbled-pumpkin-cheesecake/detail.aspx

Yeah, it's a pumpkin cheesecake, just in time for next year's holidays!  With a ginger snap crust!

I nearly made my first big mistake by grossly underestimating how many gingersnaps would have to be crumbled to make 1.5 cups.  I went with what I assumed to be three times as many as I needed, just in case, and it turned out to be exactly enough.  So don't go spreading them around until you make sure you have enough for the crust.

My only other issue with the crust is that it was very hard to spread into the springform pan.  The bottom was obviously fairly simple, but getting it an inch up the sides was rather tough.  I think with more gingersnap it would have been easier, but the melted butter made it difficult.  It came out okay in the end but I think more care with the sides would have helped.

The rest of the recipe is pretty simple, with one major caveat.  I highly recommend doubling the amount of nutmeg and cinnamon used.  I noticed a couple of people suggested that this would help the taste of the pumpkin and I have to agree that it was just right with twice as much as suggested.

Beyond my first encounter with a springform pan, the act of marbling a cheesecake (or even making a cheesecake, but that turned out to be reasonably easy) was the big neat trick I learned.  I followed the instructions in the recipe exactly and I think it turned out pretty good.  It certainly tasted like it.

Saturday 15 October 2011

Taste Odyssey #8 - Milk Chocolate Chip Graham Cracker Bundt

This recipe comes courtesy of the fantastic book "Piece of Cake!" which is full of delicious recipes like this for pretty much every occasion.  I won't be reproducing their recipes every time, but I figured they wouldn't kill me to just list this one since the cake it made was fabulous and really sells the whole book in my opinion.

Prep work:

  1. Preheat oven to 350 degrees Fahrenheit
  2. Make sure you have a 10-inch Bundt pan, sprayed with nonstick baking spray and then floured

Ingredients:

  • 2 cups graham cracker crumbs
  • 1 cup all-purpose flour
  • 3/4 cup packed light brown sugar
  • 1/3 cup granulated sugar
  • 1 tsp baking powder
  • 1 tsp baking soda
  • 1/2 tsp salt
  • 3 large eggs (room temperature)
  • 1 cup buttermilk
  • 1/2 cup unsalted butter, melted and cooled slightly
  • 2 tsp vanilla extract
  • 1 and 1/2 cups milk chocolate chips

Process:

1. Whisk together graham cracker crumbs, flour, brown sugar, granulated sugar, baking powder, baking soda, salt.

2. Add eggs, buttermilk, butter and vanilla to flour mixture, beat for 1 minute with an electric mixer until blended.  Scrape sides and bottom of bowl with a spatula.  Beat on high speed for 2 minutes.  Gently stir in chocolate chips.


3. Spread batter evenly in pan.
4. Bake for 45 minutes.  Cool in pan on a wire rack for 10 minutes, then invert onto rack and cool completely.


Thoughts:

One bowl, no waiting.  I love this book to bits, and simple recipes like this are pretty much the reason why.  This cake is delicious.  It's milk chocolate chips instead of semi-sweet and the graham crackers set it off nicely, or some equally important food-person speak.  It just tastes good, dammit!  There's nothing in it that requires any grand skill or forethought beyond paying attention, but the results speak for themselves. 

My one tip is to really heed the scraping the sides and bottom part.  Once the batter starts getting mixed some of the powdery stuff likes to settle to the bottom and won't make it out without a little encouragement.

This was my first recipe that really got me into using a mixer.  Previously I'd been doing everything by hand.  This time I used our hand mixer and got very impressive results.  On the one hand, doing it all by hand is cool.  On the other, it's bloody stupid and the batter gets much more evenly mixed with the mixer.

I do notice for Bundt cakes that they tend to come out very dry on the outside, due to the nature of the pan.  This worried me at first, but it's just how they roll.  The inside was soft and moist and so, so good.

No major food warnings on this one either.  Buttermilk was really the only thing I hadn't had experience with but it was not an issue at all, thankfully.  Just bake and enjoy!  Next time we'll be back with my Thanksgiving project, which is two recipes and pretty much a caloric slab.

Friday 30 September 2011

Taste Odyssey #7 - A to Z Everything-But-The-Kitchen-Sink Chocolate Chip Cookies

Recipe: http://allrecipes.com/recipe/a-to-z-everything-but-the-kitchen-sink-chocolate-chip-cookies/detail.aspx

After a vacation and a birthday weekend where the oft-demanded chocolate cavity maker cake (see #4 below) was pressed back into service, I finally got the chance to try something new for the baking arsenal.  I hadn't yet made any chocolate chip cookies from scratch, and when I stumbled across these, well, the name alone made them too interesting to pass up.

Despite such a promising name, however, the end result wasn't exactly to my liking.  Or was it?  Frankly, without a dead body falling out of the cookbook that's about as much drama and suspense as I can wring from a blog about baking, so let's just act like we're in the middle of sweeps week and press onward.

Actually, I'm going to make an initial admission here that I ended up making these cookies twice in the span of three days.  On a lark I decided to take a batch to work; I wanted to divest myself of some of the excess ingredients and it was an easy, but appreciated, gesture.  Things went... more interesting... the second time around.  That's body from the cookbook moment number two there.

First off, let's examine the mistakes I made with the initial batch.  I forgot to buy coconut, so even though it's a prescribed part of the package, it had no presence in either run of these cookies.  No great loss, I don't think.  You could consider it a substitution, or alteration, but in reality it was just because I was a bloody idiot and didn't make a shopping list.

My other sin was in not softening the butter enough.  As if I needed any help making things more difficult on myself, this really ended up giving me a lot of grief in getting a smooth distribution of the mixture.  I made sure to make it that much softer for the second batch.

Now we move to the substitutions, and let me tell you that this recipe ended up with enough of those to give a Chinese take-out nightmares.  First off, walnuts are not really my favorite and if I'm going to eat these then I'm not about to make them unpalatable to me.  It's part of the same solemn vow that will see a raisin in one of these recipes only after hell freezes over.  I had pecan pieces left over from the original carrot cake recipe that started this whole mess, so in they went.

After reading a bunch of the comments on the recipe, one person suggested that Frosted Flakes were a better cereal to use than Corn Flakes.  Well, William Kellogg gets his pound of flesh out of me either way and at least I'd get at least a couple of breakfasts from leftover Frosted Flakes.  Ergo, Tony the Tiger pinch hits here for Reginald Rooster.  Shocking revelation: they didn't add anywhere near as much to the recipe as I had hoped.  I was expecting something grrrrreat, but the change was hardly noticeable (not that I made a Corn Flakes batch, but I couldn't tell the Frosted Flakes were there which means they might as well have been anything).

Several people said that the mace was far too overpowering and suggested replacing it with an extra dash of nutmeg.  This is where the first recipe went a bit haywire; my extra dash got a bit out of control and with the kind of shrug that only the terribly foolhardly can properly manage I just went along with it.

Final result?  Some reasonably tasty oatmeal chocolate chip cookies with no real distinguishing features to them worth noting.  After all the comments and the ingredient list, I was really hoping for something special in these cookies.  Slightly bummed, I shared the batch to my usual suspects and that was that.

However, when I made the second batch, I properly adjusted the nutmeg and was very precise in my measuring.  I also had the butter more evenly mixed.   End result for round two? Much praise and a quickly emptied cookie container.  I have it on good authority that these were a huge improvement over the first round.  The problem was, neither my wife nor myself really wanted them again after the first batch was so underwhelming.  So my co-worker, who had tried the first batch and the second, is the lone person who tried both and she said the second batch was way better.  I can only assume the nutmeg was a big issue because otherwise the two batches were exactly alike.

On the health front, nothing at all was much of an issue.  Rolled oats are sometimes a question mark, but it seemed fine.  An unremarkable end for an unremarkable cookie.

Saturday 3 September 2011

Taste Odyssey #6 - Peanut Butter Bars

Recipe: http://allrecipes.com/Recipe/Peanut-Butter-Bars-I/Detail.aspx?prop31=5

There's not a lot to be said for this recipe.  I learned a few important lessons from it, so from a beginner standpoint it was a fantastic recipe, but it's very basic at the same time as it's very, very good.   Conversely, despite being delicious it also gave my wife a migraine and gave me a slightly queasy feeling (which I had conveniently forgotten about from when my mother used to make them years ago), so I'm not planning to make this a recipe that I come back to any time soon.  Nobody else managed this problem, however, and even those of us who fell ill still agreed they tasted great, so if you're feeling that masochistic baking urge then your ship may have come in.

The bottom layer is very simplistic.  My first lesson from this recipe was learning that confectioner's sugar is just icing sugar.  If you're like me, and I know I am, this may have thrown you off at first glance.  From my professional novice perspective I spent quite some time trying to find confectioner's sugar in stores before I resorted to the internet, which of course immediately showed me the way.  Oops.  Next was melting butter, which was a simple matter of a saucepan and medium heat, quite the contrast to certain other melting attempts.  Only the peanut butter looks to pose any real issue but it went pretty quickly into the mixture and the whole thing spread very easily into the pan.

Next stop, the topping, which is just melted chocolate chips.  Of course, after the truffle debacle I was incredibly leery of going back to the melted chocolate well, but there's no point in not challenging myself.  This time around I re-used my stoneware bowl, set the microwave at the higher 70% power level, and let it go for two minutes.  Perfect.  Depressingly so, given my struggles when I was doing the truffles.  Minimal stirring required to just get rid of the last couple hard chips, then an easy pour over the pan.


Dramatic action shot here.  Once the chocolate is nicely spread, resist the urge to carve a dirty word into it before it sets and stuff it into the refrigerator for an hour.  Cut, serve, enjoy, regret, repeat ad nauseum (lots of nauseum in my case).

That's it from this end of the world for the week.  Like I say, this recipe does taste amazing but you should know you may get more than you bargain for from the deal.  Still, it's hard to argue with results that look this good.


Friday 19 August 2011

Taste Odyssey #5 - "Easy" Oreo Truffles

Recipe: http://allrecipes.com/recipe/easy-oreo-truffles/detail.aspx

I may have added the quotation marks around the easy.  Pulling way into the lead for the most obnoxious recipe I have yet attempted, this week's experiment is going to be a lot of error and a little bit of trial and probably quite a bit of recollected swearing.  At least there are happy pictures.  To get the migraine warning done from the get-go, there is nothing in any of the ingredients here that should cause problems to your average MSG or food thickener sensitive eater.

We'll begin with my first admonishment; I'm not sure what crazy Oreo packages are available in the States, but we definitely don't have the large-size "Trailer Park Biscotti" package that the ingredient list calls for on most Canadian store shelves.  Or any Canadian store shelves.  You are definitely going to need two boxes to make up the 36 Oreos plus 9 extra.  Especially if you dip into the stock.

Speaking of, there will be no further discussion of the "set aside 9 Oreos to be crushed for garnish later" because I ate them all while I was in the middle of crushing the first 36.  Baking be not proud.  In my own defense, I don't see that they would have added much besides some visual appeal.  Since they looked fine without, we'll just go with the idea that the extra baker bling was not required.

Starting off proper, it was time for our good buddy Mr. Rolling Pin to come back into our lives, ready to wail on those Oreos like it was the end of the Stanley Cup finals and he needed a new TV.  I'm going to say that while I have yet to start into the food processor for these weekly experiments I probably could have used one here.  Crushing 36 Oreos to a fine paste requires a serious application of force for way longer than I was expecting and I had to pause more than once to let the pain dull.  Your basic large size Ziploc bag will comfortably hold all the Oreos for the pulping.  You know you're done when it looks like you've beaten the taste out of them and your arm is taking out a restraining order against you.


Delicious.  As if that wasn't joint-crushing enough, the next step on this jaunt is to combine these crumbs with the softened cream cheese.  This part is pretty straightforward, although it requires a lot of elbow grease to get things mixed together.  Again, the food processor would probably have helped at this juncture but you don't get the same level of madness or frustration that I experienced and where would the fun in that be?  You will know that the mixture is ready when it has a consistent texture of a giant cow pat.


Now you're ready to practice throwing for rodeo competitions.  Or you could continue baking.  Your choice, I give you options here.  Next step, and one they don't really mention in the recipe but I read in the comments and will make your life and mine much easier, stuff the dough in the fridge for about 10-15 minutes to cool.  You're going to be rolling these happy campers into little balls about an inch around and having the dough chilled makes this infinitely easier.


The balls, in turn, are going into the freezer for 15 minutes, which is why I laid them out on this glass container to keep them separate.  I ended up splitting the truffles into two separate batches, which is pretty much a necessity if you're working with melted chocolate and are a slow-ass such as myself.

Once your balls are chilled, and you can make your own joke here, I don't think you need my help, you are on to the chocolate melting portion of our show.  I had originally planned to jury-rig a double-boiler using some instructions I found around the internet.  By this point in the cooking process I was so bugger annoyed that I went to the microwave method instead.  In my defense...  I got nothing.  However, the microwave method worked well enough that I would use that over fiddling with double-boilers any day of the week.

Since you'll be doing this twice, grab the first package of chocolate and break it apart into little chunks in a bowl that ideally won't retain a lot of heat.  I used stoneware and it seemed to do fine.  You should melt the chocolate for two minutes on medium heat.  I will say that both times I did this I used 50% and 60% power respectively and the chocolate did not melt as fast as I wanted and started to harden much sooner than was conducive to me not swearing loudly.  Hindsight being what it is, I'd say do two minutes at 70% power, times varying based on microwave power etc, and then poke at your chunks.  While they may retain their shape at the start, the chocolate should go into soupy blob form with a little prodding from a plastic spatula if it is hot enough.  If this does not occur with ease, the chocolate is not hot enough, trust me.

Once you have the chocolate melted, it's dipping time.  Since you froze your balls off, free one for you there, you will have a much easier time getting the truffles to hold shape when they are engorged in the chocolaty death that awaits them.  Make sure you have a cookie sheet ready to go with wax paper on top, then grab a fork.  Balance truffle on fork, dip and roll around in chocolate as needed, lift, let excess chocolate drain, then place on sheet.  Repeat until the truffles are coated, bog easy.  To describe.  To do, with partially melted chocolate?  Much harder.


Once you have the truffles inelegantly laid out, stuff them in the fridge for an hour to cool and harden and all that good jazz.  Then serve.  I have to say that I was not a huge fan of how these tasted, but I was well and away the minority.  It may have to do with how embittered I was after the whole damn process, to be fair, but everybody else absolutely loved them.  I suspect with the knowledge I put together here I could make these with much less hassle and since they went over well, I will probably give them another go at some point.

On that note, I'll be back in two weeks with another crazy creation from the kitchen.  I've got a course going on this weekend that will preclude me from getting a recipe together, to the delight of my pancreas no doubt, but I'll return with something that I hope will be equally delectable.  Until then, let them eat bake!

Thursday 11 August 2011

Taste Odyssey #4 - Chocolate Cavity Maker Cake

Recipe: http://allrecipes.com/recipe/chocolate-cavity-maker-cake/detail.aspx

This cake is ridiculously processed compared to the recipes I tend to favor, but the sound of it was too good to pass up.  I'm glad I bent my rules a little for this one because it is so decadent it ought to have a poetry reading at a salon.  I just checked and this is my first use of the word decadent, soon you will understand why.

Another experience in being a guy who is getting the hang of baking in this week's installment.  Did you know that a Bundt cake pan is the same thing as a fluted cake pan?  That makes one of us; definitely not this poor dimwitted chef who spent far too long scrutinizing every pan at Wal-Mart before fighting off my most base perfectionist desires and just grabbing the damn pan that looked pretty close to what I was looking for.  Turns out it was exactly what I was looking for, but now nobody else has to suffer as I have suffered.  Until they try to flour the pan.  See the first recipe entry for details on flouring if you want the refresher course, but let me tell you that flouring a fluted cake pan is a hell of an exercise.

Back to the ingredients.  You're in trouble with food sensitivities right out of the gate on this one.  Betty Crocker doesn't give a rat's ass if you can't handle your gluten; that xanthan gum is a potential landmine for some people.  It is way down on the ingredients list and it didn't hurt my wife either of the two times she had it, but you are warned.

Otherwise the list is fine - I chose Kahlua for the coffee liqueur and it was perfect.  Your sampler bottle is going to give you enough booze for roughly 1.8 of these cakes, luckily I had some extra mini-bottles around to top up the second attempt.

That brings me to another interesting point; I made this cake twice on two subsequent weekends but both times it was different and I think that both versions had their merits.  I made the first cake with mint chocolate chips, as I read that the mint really set it off.  Now, the alteration suggested using a package of crushed Andes mints, which I can't get in Canada.  I replaced them with mint Chipits and I have a hunch that these were a bit stronger than the Andes would have been (you can really taste the pack llama and Sherpa!).  If you don't mind a strong taste of mint I think the cake works really well as a chocolate mint cake, but it is going to overwhelm a little.

The second cake was straight semi-sweet chocolate chips and it was amazing.  That is all.  Look, it's all chocolate, you can't really mess that up, I'm just saying that I liked the mint as well.  Oh, you don't need to ice this beauty in any way, shape, or form, it's already rich enough without.  That being said?  I totally did that.  I defrosted the leftover icing from the Skor bar squares and put it to good use.  Sure you don't need to ice it, but you should WANT to.


One thing these photos do not properly convey is the sheer heft of the cake.  The batter is very thick and the cake comes out very heavy.  It's surprisingly moist and delicious, so clearly the additional weight is from the caloric content.


Thursday 4 August 2011

Taste Odyssey #3 - Peanut Butter Cup Cookies

Recipe: http://allrecipes.com/recipe/peanut-butter-cup-cookies/detail.aspx

After this particular recipe I am now updating on a weekly basis, as I will be caught up with my current attempts at baking.  I have one left for next week's entry, and then the week after that will hopefully bring something new and exciting into all our lives and more importantly our mouths and to a relatively lesser extent our stomachs, waistlines, and lower intestines.

Right, so I stumbled onto this cookie recipe while I was browsing for ideas that looked good but didn't require a Herculean effort or some sort of baking mojo I have yet to accrue.  I went looking into these solely based on the title, figuring that they would be woefully complicated, however, given the name.  Far from it, these little scamps have pretty much all you could want in a cookie - great dough with a bit of a kick thanks to the peanut butter cups, and once you know a couple of simple tricks they are bog easy to make.

Trick one - make sure you have some decent capacity mini-muffin pans to bake them in.  That sounds ridiculous, but mini-muffin pans come in some pretty small sizes and you'll be baking these things way longer than necessary if you keep having to bake and cool off a single pan due to inadequate size (look, it matters, just accept and move on).  With a single batch yielding 40 cookies, I recommend a couple of 12-muffiners (accepted unit of measurement from the Muffinological Institute of Oslo) so you can get the whole batch done in two bakes.

Trick two - handle the peanut butter cups (I used Reese's) with care and common sense.  Try buy them as close to home as possible and not in the middle of a blisteringly hot summer day like some idiot (nobody I know, I swear).  Once home, stuff them in the fridge for an hour or so before prepping them.  This next bit is not part of the recipe, but something I read from others who had tried it and it should be considered essential to the whole thing given how easy it makes it.  After unwrapping the peanut butter cups from the fridge, toss them in a container of some kind and then throw them in the freezer for a bit (pretty sure I did an hour or so here too).  You may consider this a basic concept on the level of fire = bad, but once the cookies are out of the oven they are very hot and if you try and stuff a room temperature peanut butter cup into the center it'll come apart faster than the American economy tossed into a centrifuge.  Even the frozen ones were quickly warmed and slightly melty on the underside, but the outer peanut butter cups retained the pleasant Madison-Avenue-designed shapes that helped sell the look of the whole thing.

On the food allergen and migraine front, pretty much smooth sailing straight on through with these.  Kraft Peanut Butter in its original form has nothing of any concern.  Shockingly enough, neither did the Reese's Peanut Butter Cups, which I had fully expected to contain some extraneous thickening agent.  Nope, they are just as rich and as bad for you as you had originally thought.  Oh, and these may contain traces of peanuts, so be warned.  Ahem cough.

That's pretty much it.  The cookies look a lot like a similar version I've seen around that has Hershey's Kisses stuffed in the middle, with the difference being that the recipe for the base used here tastes better and a peanut butter cup will kick the ass of a Hershey's Kiss every day of the week.

Tuesday 2 August 2011

Taste Odyssey #2 - Skor Bar Squares w/Allegedly Vanilla Icing

Recipe: http://www.grouprecipes.com/6489/awesome-skor-squares.html
Recipe: http://www.canadianliving.com/food/creamy_vanilla_frosting.php

I look forward to going to once-a-week posting once I finally catch up to my current experiments in baked goods, but for now you can enjoy as I keep pushing through my check list of culinary conquests.

Important Cross-Border Cooking Clarification - Skor Bars are a chocolate-coated toffee confection that tastes like delicious.  The closest American equivalent for this recipe are Heath Bars.  If they do not sell chips of this product, please don't look too hard at how awesome this recipe is.

Compared to the diabolical complexity of the whole carrot cake experiment, this proved to be a very, very easy follow-up.  On the Superman Scale of Dessert Complexity, the carrot cake was easily a Lex Luthor master plan whereas this one was more like a guy named Doug trying to get out of paying his bar tab. 

This recipe was born from my desire to recreate a similar one that my mother had made some years prior, but I didn't really feel like asking for what she used.  My whole thing here is exploring and trying to learn something, so I went hunting for something that sounded about right and made it.  Undoubtedly the simplest recipe I have attempted so far; the hardest part was getting the icing made. In fact, I whipped up two pans of these in the same time it took to do the carrot cake, if not less.

First off, in terms of ingredients, the only thing that was slightly sketchy here were the Ritz crackers.  You'd be amazed what they hide in food packaging labels and I was still a bit worried after I vetted them that rogue MSG could be lying in wait.  Turns out that this is not the case, I am happy to report.  Icing was a different story; your laboratory bred can of pre-made frosting is a quick and easy fix but it has a list of chemicals that wouldn't sound out of place on a package labelled "Penzoil" let alone "Duncan Hines" and I do not trust them.

But, let's start at the beginning.  Undoubtedly the most enjoyable part of this recipe is the crumbing of the Ritz crackers.  Simple and fast way to do this?  Punch a small hole in the side of the bag, let the air out.  Next grab your rolling pin and just start beating the holy hell out of the crackers.  After you revel in the vicarious thrill of this for a bit, get down to actual business and start rolling the pin over the bag.  The crumbing really depends on your level of devotion to the definition of the term.  I almost want to say that the first bag that had bigger bits in it turned out slightly better but both of them were delicious so it's a matter of preference.

Oh, and this is going to sound utterly dim, but when the recipe calls for condensed milk, they mean sweetened condensed milk.  Which I'm sure for many people is a bit of a 'duh' moment, but I was looking around for quite some time, vainly seeking milk that was just condensed before realizing that such a beast does not exist.

As I say, that was the easy part.  Next came the icing.  You'll notice the term 'Allegedly' up there in the title because it tasted great but the vanilla was probably not as mixed in as it should have been.  Totally my fault, so your results may vary, though it could be that the small amount of vanilla used is overwhelmed by everything else.  I did like this recipe because the icing was amazing, natural, and it made an insane amount.  I can confirm that leftover icing (and there's plenty to frost two pans of this stuff plus a ton extra) will freeze just fine and can be easily thawed out and applied later with no harm to its sugary goodness.

Big food warning regarding the whipping cream though.  I highly recommend coughing up the extra couple bucks for the all-natural stuff (Farm Boy carries it up here, I have heard Trader Joe's has similar in the States).  Your average dairy has thickened its whipping cream with a product on the label called carageenan.  It is a natural food thickener that's found in just about everything that you can imagine needs thickener (and some things that don't need thickener where apparently they toss it in just for the hell of it) because it's cheap.  It is also known to cause stomach issues in sensitive people, particularly those with IBS, and it can cause MSG-related reactions.  So if you know somebody sensitive to MSG, the whipping cream will turn your icing into something just as potentially problematic as the store-bought kind.  Since I know people with both issues, big no-no.

All potential problems avoided, however, and you have an incredibly rich and easy dessert.  Very tasty for a very minimal amount of effort.  Pardon the blurry picture but I did get better with the camera as I went.  Oddly enough the inside of our fridge is not an optimal photo studio.  Until next time, insert witty cooking catchphrase here!

Monday 1 August 2011

Taste Odyssey #1 - Carrot Cake w/Cream Cheese Icing

Recipe: http://www.canadianliving.com/food/canadas_best_carrot_cake_with_cream_cheese_icing.php

Some of my baking experiments are fueled through my wife's very delicate migraine sensibilities.  She's quite sensitive to certain foods and ingredients, so by making something that's all natural ingredients I am able to confidently provide the delicious without exacting a horrible price later on.

That was certainly the reasoning behind the carrot cake.  I'm not going to give great detail, yet, on what I have been doing, more illustrate the perils and any alterations that may have occurred along the way to the finish product.  Sadly I don't have a great picture of this carrot cake because it looked fantastic.

One thing I did not quite grasp from the outset was the concept of pan greasing and flouring, which is one of those baking terms that everybody expects you to know without actually telling you what it is.  Essentially, you grab a blob of butter, softened works really well obviously, and rub it all over the surface of the pan in question.  Then take a half cup of flour and shake it over the greased pan surface.  Next toss the flour all over the place like you're having a seizure, coat the whole thing, then dump the excess flour out.

My only thing about flouring is that I tend to leave a little too much in the pan, but I can safely say that a little extra here and there will not adversely affect anything coming out of the pan proper in my current experiences.

The recipe was pretty complicated for a first time baker, but going in with a cool head and some assistance from Cassie (my wife) it was very manageable.  She was a monster help because she shredded the carrots while I fiddled with the other stuff and helped me work the mixer.  Interestingly, this was the only recipe where I actually used our mixer, everything else has been stirred by hand.

This carrot cake recipe wins, hands down, versus most others I found because the others had raisins in them.  I don't mind a raisin but they do not belong in my baked goods.  They are like lazy man's sugar to me and if you are pro-raisin I do not mind telling you right now that this blog will disappoint, shock, dismay, and otherwise not acknowledge your stance.

As I recall, the cake was in for the whole 40 minutes, though I did check it 5 minutes ahead of schedule just to make sure it was good.  It definitely needed the full 40 to cook, which was fine since I made the icing in the meantime.  You could easily shave some time off by buying your own icing but prepared icing is chock full of chemicals and since I'm trying to stay natural here it was homemade or bust.  Besides that, the homemade was amazing and it was really, really simple to bake.

So that was the end of my first foray into baking.  Tune in next time when I start having actual pictures of the nonsense cookery I'm embarking on.

Saturday 30 July 2011

The fine art of doing precisely what is listed in a recipe.

I hope this could be the start of something good.

By good I mean delicious.

For anybody who stumbled onto this little project, my name is Mark, I'm a happily married 33-year-old geek, and I have learned, in the past month, that I love to bake.

There was no epiphany here, I didn't set a bush on fire and have it talk to me or anything like that.  One day I just got it in my head to try and make a carrot cake from scratch and icing equally from scratch.  It was a bit hectic but it turned out amazingly well.  Since then I've been playing around pretty much every week with a new dessert recipe or something like that.

I suppose I could cook, but my wife does a better job at it in my opinion, and my forte seems to be grilling and baking.  Baking seems to be a good fit for my ability and it gives me a rare feeling of satisfaction that I often don't get in my work of late.

I don't want to go off on any major tangents here, the whole purpose of this blog is one and one alone.  I intend to depict and describe my attempts to learn more about myself and the wonderful world I've managed to unlock here.  I want to make a little chronicle of what I am trying, what I am learning, what works and what does not, simply so I can learn.

That being said, time to get to the real business here...  the food!